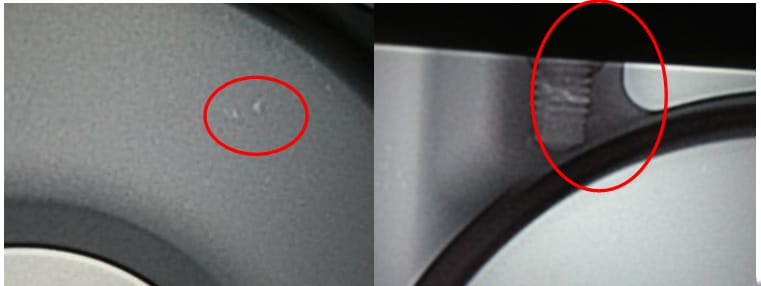
Die-Casting Machine Common Failures and Troubleshooting Checklists
Usage Instructions
When a die-casting machine shows abnormalities, use these checklists to troubleshoot step-by-step. Each checklist starts with a symptom, lists checks to identify causes, and provides actions to resolve issues. Follow safety protocols and company procedures during operation.

Checklist 1: Oil Pump Fails to Start
The oil pump is the power core; failure stops the system. Common in cold or hot chamber machines, requiring quick electrical or mechanical diagnosis.
| Step | Check | Action |
|---|---|---|
| 1 | Is the relay engaging? | If No, proceed to Step 2; if Yes, Step 6 |
| 2 | Is the thermal relay1 tripped or damaged? | If Yes, reset or replace thermal relay |
| 3 | Is the power circuit open? | If Yes, check and repair with multimeter |
| 4 | Are start/stop button contacts normal? | If No, repair or replace contacts |
| 5 | Is the relay coil damaged? | If Yes, test with multimeter and replace coil |
| 6 | Is the oil pump seized? | If Yes, manually turn coupling to clean or replace pump |
| 7 | Is the relay-to-motor wiring normal? | If No, repair wiring |
| 8 | Is the pump assembled too tightly? | If Yes, adjust coupling gap to 3-5mm |
Checklist 2: Thermal Relay Trips
Tripping occurs after pressing start, often due to current or load issues, requiring electrical and hydraulic checks.
| Step | Check | Action |
|---|---|---|
| 1 | Is the thermal relay damaged or set too low? | If Yes, replace or adjust to rated value (e.g., 10A) |
| 2 | Is voltage too low or phases unbalanced? | If Yes, check power supply (should be 380V) |
| 3 | Are motor three-phase winding resistances balanced? | If No, test with multimeter and repair motor |
| 4 | Is total or dual pump pressure too high? | If Yes, reduce to 70 MPa |
| 5 | Is the oil pump seized or overtightened? | If Yes, clean pump or adjust gap |
Checklist 3: No System Pressure
Lack of pressure affects clamping and injection, requiring electrical or hydraulic differentiation.
| Step | Check | Action |
|---|---|---|
| 1 | Is there current output on the pressure gauge? | If Yes, proceed to Step 2; if No, Step 6 |
| 2 | Is the oil pump rotating counterclockwise? | If Yes, adjust to clockwise |
| 3 | Is the relief valve stuck or misadjusted? | If Yes, clean valve or adjust to 80 MPa |
| 4 | Is the shut-off valve closed? | If Yes, open shut-off valve |
| 5 | Is the proportional relief valve throttle loose? | If Yes, tighten or replace throttle |
| 6 | Is the rectifier board damaged? | If Yes, replace rectifier board |
| 7 | Does the computer show input/output signals? | If No, check wiring or computer fault |
| 8 | Is the proportional board-to-valve wiring normal? | If No, repair wiring or check coil |
Checklist 4: No Automatic Operation
Automatic mode failure often ties to safety conditions or signal issues, possibly from manual resets.
| Step | Check | Action |
|---|---|---|
| 1 | Is manual operation normal? | If No, troubleshoot manual faults first |
| 2 | Is the safety gate limit switch normal? | If No, check or replace limit switch |
| 3 | Is the ejector pin returned? | If No, adjust ejector to origin |
| 4 | Is the clamping signal on? | If No, check clamping wiring or conditions |
| 5 | Is the auto signal on? | If No, check auto selector switch |
Checklist 5: Cannot Adjust Mold
Mold adjustment failure affects setup, requiring condition and hydraulic checks.
| Step | Check | Action |
|---|---|---|
| 1 | Are mold adjustment conditions met? | If No, check conditions (e.g., pressure 10 MPa) |
| 2 | Is adjustment pressure too low? | If Yes, increase pressure setting |
| 3 | Is manual operation correct? | If No, follow manual instructions |
| 4 | Is the adjustment hydraulic motor stuck or damaged? | If Yes, clean or replace motor |
| 5 | Is the adjustment valve spool stuck? | If Yes, clean spool |
| 6 | Are transmission components worn or jammed? | If Yes, repair transmission parts |
Checklist 6: Entire Machine Inoperative
Complete stoppage involves power, control, or valve issues, starting with pressure checks.
| Step | Check | Action |
|---|---|---|
| 1 | Does the pressure gauge show pressure after pressing start? | If No, proceed to Step 2; if Yes, Step 6 |
| 2 | Is the rectifier board or fuse damaged? | If Yes, replace rectifier board or fuse |
| 3 | Is P01 board input/output normal? | If No, check P01 board |
| 4 | Is the relief valve stuck? | If Yes, clean or adjust relief valve |
| 5 | Is pressure setting too low? | If Yes, adjust to 80 MPa |
| 6 | Is the 14-channel amplifier board normal? | If No, check or replace amplifier |
| 7 | Is the valve 0V wiring broken? | If Yes, repair wiring |
Checklist 7: No Clamping
Clamping failure risks mold safety, requiring signal and pressure analysis.
| Step | Check | Action |
|---|---|---|
| 1 | Is the clamping indicator on or computer showing signal? | If No, proceed to Step 2; if Yes, Step 6 |
| 2 | Is the safety gate closed? | If No, close safety gate |
| 3 | Is the ejector pin returned? | If No, adjust ejector position |
| 4 | Is the clamping limit switch damaged? | If Yes, replace limit switch |
| 5 | Is the computer faulty? | If Yes, check computer or back door status |
| 6 | Is clamping pressure2 normal (should be 100 MPa)? | If No, adjust pressure |
| 7 | Is the 14-channel amplifier board normal? | If No, replace amplifier |
| 8 | Is the clamping cylinder damaged? | If Yes, repair or replace cylinder |
Checklist 8: No Low-Pressure Clamping
Low-pressure clamping failure affects mold protection, focusing on sensors.
| Step | Check | Action |
|---|---|---|
| 1 | Is the low-pressure clamping indicator on? | If No, proceed to Step 2; if Yes, Step 3 |
| 2 | Is the low-pressure sensor damaged? | If Yes, replace sensor |
| 3 | Is the low-pressure dial adjusted? | If No, adjust or replace dial |
Checklist 9: No High-Pressure Clamping
High-pressure clamping loss impacts forming, checking sensors and settings.
| Step | Check | Action |
|---|---|---|
| 1 | Is the high-pressure sensor normal? | If No, replace sensor |
| 2 | Is total pressure setting too low? | If Yes, adjust to 100 MPa |
Checklist 10: No Normal-Speed Clamping
Normal-speed clamping failure slows production, checking signals and hydraulics.
| Step | Check | Action |
|---|---|---|
| 1 | Does the computer show normal-speed input? | If No, proceed to Step 2; if Yes, Step 3 |
| 2 | Is the speed selector wiring normal? | If No, repair wiring |
| 3 | Does the computer show output? | If No, check computer fault |
| 4 | Is the 14-channel amplifier normal? | If No, replace amplifier |
| 5 | Is the valve wiring normal? | If No, repair wiring |
| 6 | Is the normal-speed valve stuck? | If Yes, clean spool |
Checklist 11: No Mold Opening
Mold opening failure may stem from signals or hydraulics, checking indicators.
| Step | Check | Action |
|---|---|---|
| 1 | Is the opening indicator on or computer showing signal? | If No, proceed to Step 2; if Yes, Step 4 |
| 2 | Is the opening limit switch normal? | If No, replace switch |
| 3 | Does the computer show input? | If No, check opening button wiring |
| 4 | Is the 14-channel amplifier normal? | If No, replac |